
COLOUR
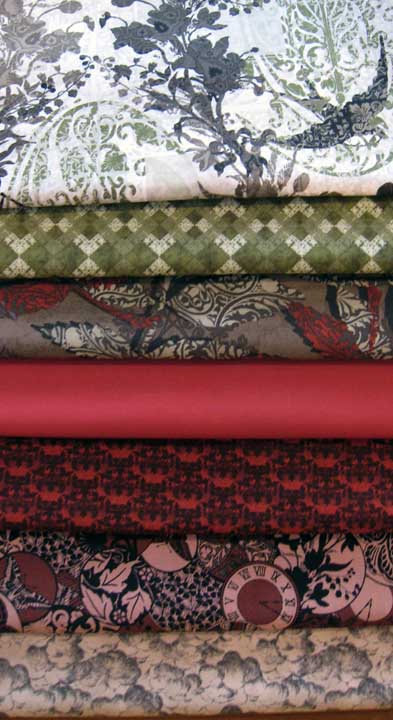
I must have spent at least 3 days playing with colour and fabrics for this quilt. Of course after all that, I got it wrong. First I did some colouring in to find the colourway I wanted. My first thought was for red/black, then I played with pink/blue/black, then tried orange/gold/black to see how it looked.

I was quite taken with the red/black, and started playing with fabrics, throwing in green & cream........before suddenly changing my mind completely, going for orange/black instead.


Decisions, decisions, decisions!
The quilt is made of only 2 blocks - a nine patch and fence post rails. The fence post rails would have black in the centre, with 3 shades of orange (rust,orange,gold). The nine patch blocks have 3 fabrics - centre, cross & background.
I tried a couple of different options with the nine-patch, changing the centres, meanwhile the fence post blocks looked suspiciously like licorice allsorts! Uh Oh.

All laid out, the licorice allsorts blended into the pattern and looked ok, the nine-patches however, remained a problem. The side setting triangles were good with no issues in cutting and sewing them.

I had chosen a gradient fabric for the nine-patch 'cross'. The fabric started brown/rust and graduated to gold - it should have blended beautifully. It didn't. The cacophony of colours looks confusing, making the top incoherent and messy.

In hindsight, it would have been better to use the graduated fabric as a border
Here is my completed effort..................

DESIGN WALL
As I mentioned in the last post, due to lots of windows and not much wall space, I have to lay my quilt blocks on the floor. This was not working particularly well - I'd step on the blocks, or run them over with my chair! With the help of the quilting group ladies, I'd settled on using a roller blind hung over the door or a window. I could attach batting to it and roll it up out of the way when not in use.
Husband John had a different idea - why not ditch the curtains - which I don't use - instead of buying a roller blind? Excellent! I picked up a couple of metres of Wonder Wall, John put grommets through the top and hung it on the curtain rings. Voila - a design wall!


Ties back neatly out of the way when not in use. Nice!
I still need to attach hooks on the bottom, so the 'curtain' hangs straight & taut, but it works very well!
Love the design wall!
ReplyDeleteI bought a length of flannel backed vinyl recently and am looking forward to having the wall space to hang it on. The bed worked last night - though more than one block was slightly displaced when the Corgis landed on it periodically!
Cheers, K
Goodness! This looks nice - better than my old 50 cent rummage sale plastic tablecloth back!
ReplyDelete