Quilter's Academy - Volume 2 - Sophomore Year

Vol 3 - Junior Year


Wednesday, August 28, 2013

QA - Vol 3 - More Techniques

Yes, yes, it's been a while.  Lets just say I'm happier making quilts than I am making blog entries. Now where were we..............

Oh yes - Half Square Triangles (HST) techniques. These next methods are best used for making lots of triangles at once. 

METHOD #5 - SHEETING TRIANGLES
No special equipment is required for these.  Draw, sew, cut, trim.

Sorry about this pic - its a new camera and I'm having a little trouble with it - the lines are drawn on the fabric (there are two layers) then pinned on the stitching lines.

Stitching is done 1/4 inch away from both sides of the diagonal drawn lines........

Cuts are made between the stitching and also on the straight drawn lines - giving you lots of HST's!
 
I like this method - its quick, its easy and its accurate with no special tools needed - what more could you want?
 
METHOD #6 - BIAS STRIPS

Harriet gives us 3 different ways to make HST using bias strips. I've used Method 1.  Method 2 uses Fat Quarters (18" x 22") which are smaller than the Fat Quarters we buy here.  Method 3 uses a ruler I don't have the - Wonder Cut Ruler by Walter Times Two. 

Method 1 uses the Bias Square Ruler.  Squares are bias cut then the strips are sewn together.


Cut the layers fabrics on the bias.
 
Sew the strips together
 
Use the Bias Square ruler to cut out the triangles

The squares are cut oversized and trimmed back.
 
There is a lot of waste with this method. 
 
Harriet suggests using the ScrapMaster ruler on the waste.  I don't have one of these, so I'm not overly impressed with this method.  Its a lot of work especially as all the seams are pressed open.
 
METHOD #7 - EIGHT FROM A SQUARE
No special rulers or tools are required for this method, except for trimming.  This is very similar to the sheeting method.
 
Draw diagonal lines and stitch 1/4" along both sides.
 
Measure 3" away from the edge and cut down the middle in both directions
 
Cut the diagonal lines and ta-dah - 8 triangles.  Press and trim.
 
METHOD # 8 - TRIANGLE PAPER
Okay - I mucked up a little here.  I was supposed to use Triangles on a Roll, but I purchased Thangles instead.  Harriet does include a drawing you can photocopy onto legal sized paper, but our paper size here is A4 which is different and as I already had the Thangles.............
 
The point is with either type, the lines are pre-printed saving you the time and effort of drawing on your fabric.  You can also be assured that the marking are completely accurate.  You need to sew straight because the HST's are exact to size with no allowance for trimming back.
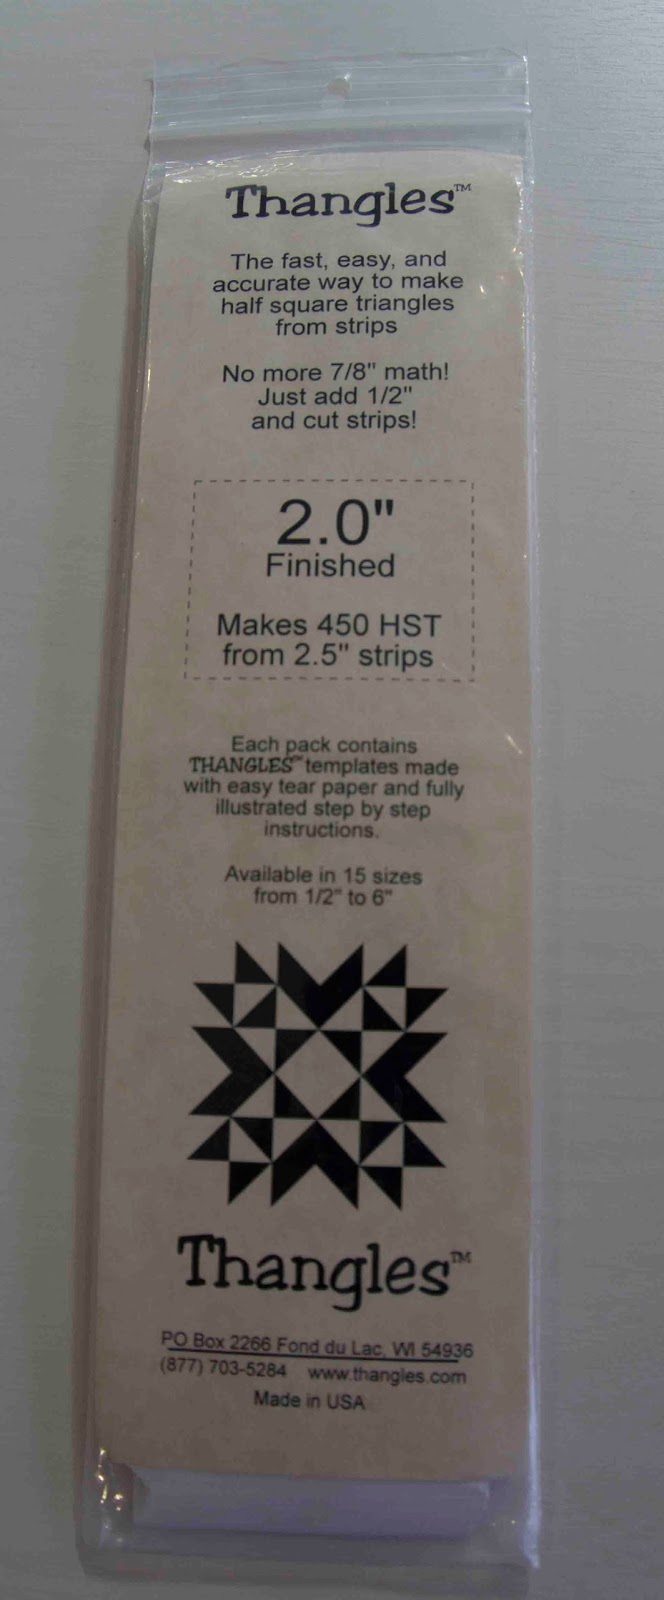
 
Thangles

Cut a strip and pin the Thangles on top

Sew on the marked lines

Press while the paper is still on

Remove the paper.  Trim the points off.
 
Not having to draw the lines does save some time, but pinning all those bits of paper on takes a while.  So does removing all the paper - for me the removal wasn't clean and I spent ages getting bits of paper out of the seams. 
 
This method is not for me.  Drawing the lines would be faster.  I will admit thought that when I found myself short of a couple of triangles and needed to make up a few extra, I headed straight for the Thangles.  Probably because this was the last method I'd used and the technique was still fresh in my mind.  Anyway I have a heap of these things to use up.  But when they are gone I won't be replacing them.
 
ON TO MAKING STUFF..........
Now that I have a whole heap of HST's what am I going to do with them?  Sew them into blocks of course. 


Here's a peek at what's coming up...........
 

Carrie's Table Runner
 
Harriet's Broken Dishes


Saturday, April 6, 2013

QA Vol 3 - Techniques

I have some triangles to cut.  Harriet gives suggestions on using 8 different methods of cutting half square triangles.  I gave some of them a try.

METHOD #1 - ROTARY CUT
Here is the most basic way of cutting half square triangles (HST) using the equipment you already have.  No speciality rulers required here.  Oh - that's not actually correct as the finished triangles are trimmed using the Precision Trimmer 6, but you could use your normal ruler for trimming if you want.

Fabric is cut into strips, cut into squares, cut diagonally in half to make triangles which are then chain stitched together, snipped apart. pressed and trimmed.

The instructions in the book have you make these strips/squares larger than needed, so they can be trimmed back later.  More work but more accurate.  Not only does the book have detailed cutting instructions there are also detailed pressing instructions, as pressing triangles is trickier than pressing squares and can be easily pressed right out of shape!

As suggested I'm putting the results of all the different methods into envelopes with notes on the technique written on the front and my impressions written on the back.

In this envelope are another 15 squares like this one to be used later in a Table Runner

METHOD #2 - SEW AND SLICE
For this method I used the QUICK QUARTER and the ANGLER 2 as well as the PRECISION 6

 
The Angler 2 and the Quick Quarter 

Again strips are cut oversized then cross cut into squares.  The Quick Quarter is used to draw sewing and cutting lines on the fabric.

The Quick Quarter
 
The book also suggests using the Perkins Dry Goods' Perfect Piecing Seam Guide when sewing the triangles but I don't have one of those, so can't comment.
 
The Angler 2 is attached to the bed of your sewing machine.  It's got lots of lines marked on it which you are supposed to follow without the need to draw lines on your fabric.  I wasn't able to get the hang of this at all.  But used in conjunction with the lines I drew with the Quick Quarter, the sewing was really accurate.
 
Attached with surgical tape which has no sticky residue (which I also use to tape down the ends of unruly threads on reels).
 
The lines on the fabric matching the lines on the Angler 2 make for really accurate chain sewing
 
Then of course the inevitable trimming.  The Precision 6 does a great job with this
 
Despite not being able to use the Angler 2 properly, I really like this method.  No squares were rejected for being out of square or undersized.
 
METHOD #3 PERFECT PATCHWORK TEMPLATES
This method uses Marti Michell's templates from her B set.  I ended up buying Sets A & B plus the Vol 1 book as a package deal and of course paying for postage.  As I used only one template from Set B, this was an expensive method for me.  I'm hoping I'll get future use from the rest of the template package.
 
Template 13 from Set B
 
Again we cut strips then place the template against the edge and cut around the template.  I used a small rotating cutting mat and a 28mm rotary cutter but still found the process tedious and clumsy.
 
A fiddly but accurate method
 
Even though these are cut to size  you still need to measure to check the finished size of the squares for size accuracy.
 
The Marti Michell triangles have neat blunt corners
 
METHOD #4 - EASY ANGLE
Again we cut strips and use this tool against the edge of the fabric to cut our HST. 
The Easy Angle
 
The Easy Angle has a black tip which is positioned below the edge of the fabric, making this tool fast and easy to use.  I like it.
 
Simple and efficient.
The Easy Angle gives you a blunt edge which makes it easy to get it under the presser foot and sew accurately.
 
I had to reject 2 of the resulting squares which were out of square.  Making your triangles a bit larger and trimming them back would be better for me.
 
METHOD #4.5 - WESTALEE HALF SQUARE TRIANGLE
This method was not included in QA Vol 3 but as I already had the ruler (long story as to why I own this) I decided to include it.  This is an Australian product and info about Westalee can be found here http://www.westalee.com.au/ 
 
 
The trick to Westalee rulers is the sliding fabric guide which you lock in making your cuts extremely accurate.  The seams are included with this ruler, which is also a bonus feature.
 
Using this is similar to the others with fabric strips being cut and the ruler placed along the strip.  I like this technique as well.
 
Westalee also make a really neat little trimmer to take off those dog ears.  The hole in the centre for your finger makes it slip proof.
 
Gahh - a bit of fuzzy focus - sorry.
 
WHICH TO USE?
So in summary which method do I prefer?  Hmm.  I like the Quick Quarter but I don't think I'll bother with the Angler 2 (unless I figure out how to use it properly).  Hated the templates, really liked the Easy Angle both for the efficiency of cutting and those blunt edges, but I would need to make them a larger size and trim them back.  I suppose my preference has to be the Westalee HST ruler.  That sliding guide is so accurate it's virtually impossible to make a bad cut.  The Precision Trimmer is a must have!

So I've invested a bit of money in purchasing all these different rulers only to find the one I like the best is the one I already owned! LOL.  But as the book suggests, no one method is perfect for all situations. 

I still have several more methods to test - off to the sewing room!


Monday, April 1, 2013

Quilter's Academy Vol. 3 - Junior Year

Book 3!  Yay, it's taken a while but I got here.  Admittedly I still have one more quilt to quilt from Vol 2, but that will be done soon enough.

Book 3 is all about triangles.  I've barely done any work with triangles at all , so I am feeling very much back in beginner mode with this book.  The first project in the book is a table runner, but I have a fair bit of work to do before I get anywhere near Project 1.

LET'S GET STARTED
There is a whole lot of valuable information on the equipment required for triangle making, as well as a refresher on the basics.  Then it's detailed info on sewing precise triangles.  I set up my machine, armed myself with an awl and a finger presser and gave it a go.  I made a bunch of test triangles to make sure I could produce an exact 2 1/2 inch square from 2 triangles.

Practice and more practice!
 
RULERS RULE
Before getting started on the first project, I need to audition some speciality rulers.  The book suggests several different rulers to try.  Apparently, there are lots of different ways to make half square triangles, all of them good but not all of them appropriate for every situation. 
 
I have been trying to track down all of the rulers used in the book.  Not all of them are available in this country or are economical to purchase here, so it's been a bit of an exercise trying to find them all.  I've also added a ruler from Westalee, a local product.
 
A bunch of rulers which make half square triangles
 
There are 8 methods documented in the book - all the techniques result in a 2 1/2 inch square made from 2 triangles sewn together.  Each technique produces 16 squares and these will all be used in 2 projects later in the book.
 
I'll be trying out all of these techniques and giving my 'report' on how I managed with each one.  Sounds like fun!


Friday, March 22, 2013

Vol 2 - Project 13 - Quilted!

A shot at Trapunto.  Only 8 blocks were done this way as it was my first go at the technique.  I enjoyed the process though and will be doing more of this.

Simple but pretty
 
I padded the four corner blocks and the four centre blocks, the rest were the same design without the padding.  The borders got a feather/cable treatment.  The quilt has a cotton batting and a cotton damask backing, with a lovely polished sheen to it.  Very classy!

TRAPUNTO


A bit of stipple to pop that design up
 

 Compare the padded block with the unpadded one - I know which one I prefer!
 
 
Polished Damask Cotton Backing

 
Feathered Cable around the borders


Sunday, January 6, 2013

Vol 2 - Sophomore Final - Finished Top

Here it is - my completed exam top............


The colours are actually a lot brighter in real life
 
I seem to have rather a lot of black fabric outside of the frame.  I could trim this off and add a border as Carrie has done, but I've decided not to.  Here is another look at Carrie's quilt. 
 
 
I've named my quilt "Fade To Black".  Primarily because of the excess black fabric but also as a nod to the bushfires currently raging across Tasmania.  When outside your window a red glow shines beyond the nearby hills and the air is full of smoke, quiltmaking can be a good distraction.  My thoughts are with those who have lost everything in these horrible bushfires.
 
Outside my window
 
 So ends Quilters Academy Vol 2.  But I'll not be diving straight into Vol 3 just yet.  As they say, it's not a quilt until it's quilted and I have 5 quilt tops lined up.
 
I'll blog my progess with these, but despite having quilted over 50 quilts and having attended a 3 day Quilting Master Class, my quilting skills remain rather basic.  This is because I don't practice!  I will really try this year to make the effort and spend at least 10 mins a day practicing free motion.


Friday, January 4, 2013

Vol 2 - Sophomore Final - Frame Corners

I had some trouble making the corners of the internal frame but failed to see where I was going wrong.  The blocks refused to fit and nothing I did seemed to fix the problem. 

The 9 patch on the right side is 1 inch out.  The orange and yellow corners should meet as they do on the left side.
Hmmm. 
Maybe taking out 4 of the sashing pieces was a mistake.
Or maybe I had turned one or more of the blocks the wrong way when I was sewing them together.
Bad sewing?  Inconsistant seams?  Poor measuring? Crooked cutting?
Not to be beaten, I sat down and unpicked a lot of the almost completed quilt top.

Back in pieces :(
 
Taking a lot of care to place the blocks correctly, I relaid them back onto the design wall with the removed sashing pieces returned.  This threw out the design and anyway made no difference to the corner frame unit, which still didn't fit.  So the extra sashing pieces removed, I laid out the blocks again,  got the pattern correct and Yes! - it still didn't fit. :(

At this point I was giving myself a score of E for Effort but a Fail on the project.  It was hot - who makes quilts in summer anyway - I was grumpy and frustrated.  Those measurements SHOULD work.

Time to call in the big guns.  John entered the sacred sewing room armed with graph paper and a metal ruler and proceeded to ask numerous questions about 1/4 inch seams.  Drawing on the graph paper he came up with the exact same measurements I already had.  The difference was that on paper they fit, on my design wall they didn't.

Hubby to the rescue

John approached the design wall with his sturdy metal ruler.  "What size is this piece supposed to be?" he demanded.  "15 inches" I replied.  After grumbling about having to work in inches rather than centimetres, he declared "well it's not".  Stupidly, it was only this one side which was out - the other 3 were all exactly 15 inches.  And stupidly it was the only corner I worked on trying to get the measurements right as it was the easiest one to reach.  Sigh.

After making an adjustment and using the same measurements as before, I tried it again - Voila!  Success!

Whee! Hurrah!
  
The side setting triangles are next but not today.  It was seriously hot today - 41 degrees outside (that's about 106 Fahrenheit) and hotter than that inside my glass-walled sewing room.  The ave January temp in Southern Tasmania is 21.6 C (about 71 F) and my sewing room is not set up for high tempertures.  I retreated to the air con upstairs for the rest of the day. 


Wednesday, January 2, 2013

Vol 2 - Sophomore Final - Internal Frame

Internal frame - done.

 
So far so good.  There was however a glitch and a small amount of reverse sewing happening :).  Something didn't seem quite right when I looked at the photo.  Removing one sashing piece from 4 of the blocks did the trick.  Now it looks like Carrie's quilt.
 
 4 offending pieces
 
Actually I was rather glad for this.  I need exactly eight 9 patches for the frame corners, so I'll recycle these.
 
I worked on the frame corners today but ended up frustrated as I can't make them fit and I can't figure out why they don't fit.  According to my (dodgy) calculations they should fit perfectly - grrrrr.  I knew this was all going too smoothly!