No, I haven't started on the next project yet. So what's been going on? Has the student been slacking off, ditching the homework and hanging out at parties instead? Actually no. I've been working on something or other for the past 10 days since I last posted but don't seem to be getting anywhere fast.
Preparation! Behind every quilt is a load of prep work to be done which is rarely seen and hardly appreciated for the time it all takes. So for the last week or so, I decided to document what I actually do in the sewing room when not working on an actual project from the book.
I've included the NHP (Non Harriet Projects) which have been distracting me. The trouble with being a new quilter, is you keep finding lots of interesting things you want to learn and want to make. I seem to be hit from all sides with wonderful projects and techniques, ideas and want to learn all of them!
DAY ONE
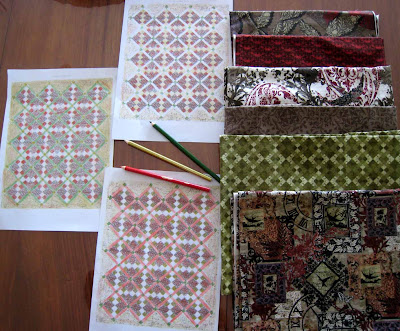
Fabrics chosen, it was time to colour in some mock ups for the next project in the book. There are five fabrics, but only 3 main colours. How these fabrics are placed within the quilt can make a huge difference to the final look. I mocked up 3 different settings
All the same but very different
Next, I had to do a bit of shopping for an upcoming workshop - embroidery items which I don't own, some stationary bits and pieces and sandpaper.
After lunch, my neighbour Pauline called in and wanted to work on our crazy quilt. We spent 4 hours making a patch. The sewing part is quick, but as the patch is 'design as you go' lots of time is spent rummaging through scraps, laces, pictures, braids, ribbons etc. trying to find just the right piece. Here's the result of a full afternoon's work. Pauline will add the embroidery then we'll both embellish with lots of interesting bits and pieces.
Just the beginning - lots more work to be done with this little patch
Crazy quilting is messy! The sewing room was strewn with fabrics, boxes of lace and buttons, cutting tools etc. I made a start on the clean up - at least I can see the table top!
In the evening I sewed a little of the binding on Metro Main street, but didn't get far with it.
DAY TWO
The sewing room clean up continued - I can't work in a mess so needed to organise before going onto the next thing.
Time to mark the borders on the Cabin in the Cotton Remake. I started marking the blocks too, but the blue marker was too hard to see - I'll need to use coloured chalk. I find it best to mark as I go when using chalk, as it doesn't survive the basting and ditch stitching terribly well.
Making the borders fit is an art - I'm still learning!
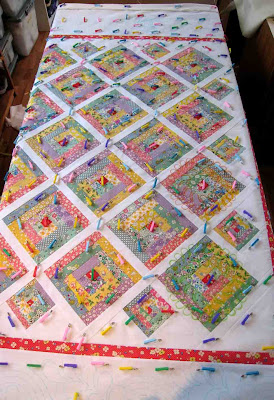
Border marking done - time for pin basting.
Ho hum - at least I'm getting faster at doing this part
Started the ditch stitching and got about 1/4 done.
Called it quits after only getting this far
A bit more hand sewing on the Metro Main Street binding - this is going unusually slowly.
DAY THREE
Completed the ditch stitching on Cabin in the Cotton. The quilting machine is playing up, so I'll leave it alone for now.
The boring part is finished!
Before beginning quilting, I always warm up on a sample. Unfortunately, the design I can do pretty well on a small sample, doesn't go so well when working it on a quilt. In Harriet's last comment
Help from Harriet she suggested making a crib size practice piece. Time to get to work!
Materials are expensive here in Oz - especially batting - so I pieced some batting and calico scraps together to make the practice sample.
Using Harriet's technique for piecing battings...........
..... the result is undetectable once sandwiched.
The calico I chopped into squares and added mis-matched borders - lots of room to play. The finished size is roughly 60" x 40".
My quilting practice piece - sandwiched up and ready to go!
After this I had some work to do on the group project (which I can't blog about) and also an applique pattern to trace off. I'm quite attracted to applique right now, so am trying a small project to practice on.
Table Runner and Journal Cover pattern by Deirdre from the Quilted Crow in Hobart
DAY FOUR
Pretty much a non-sewing day. Headed into the city to drop off my quilting machine for adjustment. As I don't get into the city very often I wandered around, bought some threads and printable fabric (for crazy quilting), met Hubby for coffee and thoroughly enjoyed the day. Some more work on the binding in the evening.
DAY FIVE
Another slack sewing day - caught up on domestic tasks instead. I did however manage to cut the fabrics and gathered supplies for the workshop. Set up the portable sewing machine, oiled and tested it and packed it ready for tomorrow (in the end didn't use the machine anyway). Finally finished hand sewing the binding on Metro Main Street!
All set for tomorrow's workshop
This is what we'll be making
DAY SIX
My quilting group - Tangled Web Quilters - have organised a workshop with Helen Stubbings. Helen is going to teach us her Faux Applique method, which involves colouring in with pencils on fabric. You can see Helen's award winning work
here . The piece we're going to make is called Dancing Daisies and Helen has given me permission to use photos of the workshop on my blog.
Colouring in!!!!
Helen Stubbings (left) gives Roxy a hand
Suzanne starts the embroidery part.
Helen had to show me how to embroider a backstitch - embroidery is something I never learned to do. I admit to really enjoying this workshop. It's something different and I took a look at the samples Helen had of hand colouring wholecloths after machine quilting - the results are absolutely stunning and it's something I'd really like to try further down the track. I purchased a couple of patterns from Helen - one of which is too advanced for me as I later found out - but the other one is a much simpler BOM which I think I can handle.
DAY SEVEN
Time to wash Metro Main Street then block it on my dining table. Yay - another one finished! I also added the borders to my workshop project and fused it to Pelon, ready to finish the embroidery part.
Faux Applique - I think it takes more work than real applique does!
I had more work to do on the Tangled Web Quilter's project, which I didn't get finished the other day, but finally have it ready for the group next Thursday.
I can't really show much more than the scraps from the project! Why are these projects so hush-hush anyway?
Did some more applique practice on the Pfaff and played around with trapunto - and yes, I managed to snip the 'quilt top' which was really only a piece of calico I was practising on.
Washed & finished - Metro Main Street gets put to its intended use - Anni approves!
DAY EIGHT
A lovely morning spent selecting fabrics for my Helen Stubbings BOM, which arrived in my PO Box the day after I ordered it - speedy service there Helen! This is not a machine quilting wholecloth pattern, but a pretty little pieced quilt with lots of Faux Applique. A good way to practice the technique before embarking on the more ambitious project. The BOM is for the pattern and instructions only - fabrics aren't included with this one which makes it an affordable BOM.
My choice of fabrics is very different from Helen's
Spent some time in the afternoon sorting out colours for the new project
Okay, it's not sewing - but all this will eventually end up as a quilt!
Did some embroidery in the evening - progress is slow!
DAY NINE
Enough distractions - time to get back to work on the next QA project. The colouring in mock up helped, but I needed to see the design with the fabrics - patterns on the fabrics can make as much a difference as colour placement does.
I cut some strips and made up some four patches to see the effect of the different combinations. I think I'm looking for a very 'blendy' effect with these fabrics, rather than a clear pattern.
Four 4 patches - Four choices
The colour of the sashings will make all the difference. I tried lots of different combinations and ended up just being confused.
I don't think this combo will make the final cut
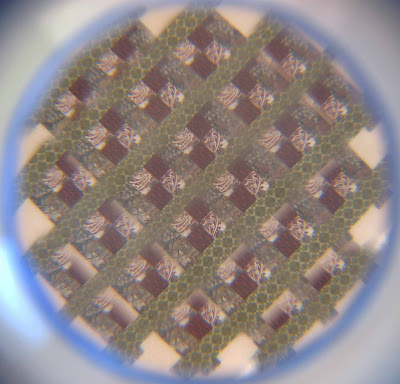
Viewing through block viewer helped me to see if I was getting the blended look I was after. Taking a photo through a block viewer is pretty tricky - thanks for your help John!
Don't try this at home!
I still haven't decided on the final selection. I'll sleep on it a bit - I plan to start real work on the project on Monday.
The only other quilt work was making a start on the Helen Stubbings BOM. Colouring in is so relaxing!
I have a whole month to get this block finished
DAY TEN
No sewing today - other stuff to do, although I'll probably work on the embroidery this evening. This morning was more prep work - this time the blog photos. These can take ages to do - especially sorting out which ones to use - then they need to be cropped, colour adjusted, re-sized and saved someplace I can find them. Then of course, writing up the blog. This blog has to be included in my sewing stuff - it's where I hand in my homework!
This afternoon I'll try to make a final decision on the fabric selections for the next Harriet project. Does anyone else agonise over these sort of decisions as much as I do??
TEN DAYS OF QUILTMAKING
So in 10 days not one quilt made, nothing really completed (except for Metro Main Street which was pretty much finished anyway) mostly just lots and lots of prep work. I don't think non-quilters have any idea how much work goes into a quilt, much of which is not done anywhere near a sewing machine or on the actual quilt.
My plans for the next week or so, is to pick up my quilting machine and get the Cabin in the Cotton Remake quilted, bound and finished. Make a start on the next Harriet project - Four Patch Lattice and at least get the blocks made. I have quilting group on Thursday to work on our project. The evenings are good for any handwork and some more colouring in. I want to squeeze in some applique work and I also have some ideas for Christmas gifts which can't wait much longer. The pattern for a grandson's birthday quilt has arrived too - but his birthday is in January, so it's probably better to put this on hold than stress and do a bad job with it. It's got lots of applique and I'd like more practice with this first.
Life as a quilting student is always full of new things, there is so much to do, so little time. So if I am a little long between blog posts, you can be assured I am still working on something quilty - it's an obsession you know!


