Quilter's Academy - Volume 2 - Sophomore Year

Vol 3 - Junior Year


Saturday, February 26, 2011

Vol 2 - Project 7 - Card Trick - Framing Triangles!

"If you want to challenge yourself, try making the setting triangles with the strip in them as Carrie did." 

A quote from the book - I took the bait!

I read through the instructions, which looked horribly complicated.  I decided to try to work this out for myself instead - not a particularly intelligent decision on my part.  Carrie suggests using the Creative Grids Side Set Triangle Ruler - which I did, and it really makes doing the triangles easy.

With the blocks laid out on the design wall, I simply slipped the ruler into the space, took note of the measurements and started cutting.  They are sewn in exactly the same way as the frames around the blocks.


They look like the newspaper hats my Dad used to make for me.

Not too difficult - the hardest part is deciding where to put the frame.  I followed Carrie's lead, placing them so they looked like they run behind the block.  (Actually trying to get them to run around the block was much trickier - I tried it and failed).

All done - time to sew the rows together

CORNER TRIANGLES
Now comes the fun part.  The instructions in the book use graph paper to figure out how to place and construct these, so that the frame turns the corner.  This wasn't going to work for me, as the pattern, rulers and instructions are all in inches.  The only graph paper I can find around here is metric with cm grids.

Instead I made a template the size I wanted and set to work trying to put these together.  Oh dear.  There may not have been tears, but there was some language as colourful as the quilt!

My first attempt was too small and the frames didn't match.
Hmmm - I need to re-think my technique here...............

I worked really hard on getting this right, and was getting frustrated with the results.  I concluded my problem was not that I didn't know what to do, but that I lack the sewing skills to do it.  I muddled my way through, using my template and my un-picker.  Follow the pictures to see what I did...........

You need to make 2 triangles per corner - my bunch of mini pirate hats!


Tah-dah!

I got there in the end.  This is a technique which for me, is best learned in person - it would be so much easier to learn this hands-on - to watch how it's done before attempting it myself.  Even a video would help!

So here is my somewhat wonky framed quilt.  It's not perfect but I'm pleased I had a go. 

"This was a bit of work, but well worth it for what these triangles add to the edge of the border.  Congratulations for trying!" 

Another quote from the book - you're certainly making us work hard Harriet!

QUILT AS DESIRED

All through the making of this quilt, I've been pondering on how to quilt it.  My first thought was that it's such an angular pattern, that some curves were needed.  Then it occurred to me that this is a contemporary looking quilt and also made for a man, so straight lines would be fine.  I like what Carrie has done with hers - she has a combination of grids in the blocks and a curvy design in the triangles.  It may be a while before I quilt it as I ponder how best to do it.  Meanwhile, it's time to make a sandwich.
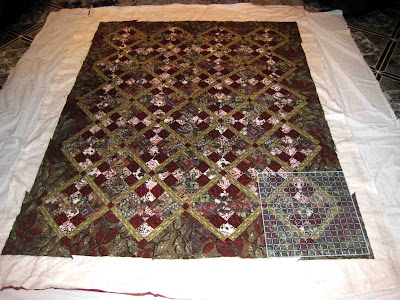
This is a very small quilt.  Really small.  I found it a handy size to work out my batting and backing sizes on the design wall.
The backing width is fine - just need to cut the length

Set the backing over the batting and cut to size - handy dandy!

Monday, February 21, 2011

Vol 2 - Project 6 - Four Patch Lattice - Orange Chalk Removal

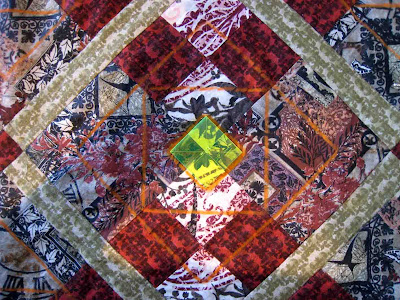
The finished quilt

It's summer.  My sewing room has lots of windows and catches the sun in the afternoon.  On a warm day it gets hot - on a hot day it's like an oven.  So mystery solved as to why the chalk didn't dust off or wash out.

I remember marking this top and starting the quilting before going interstate for a week, then another week or so before I got back to finishing the quilting.  Meanwhile, the quilt has been sitting, folded in a sometimes very hot room for weeks.  The chalk had heat set.

I received a lot of advise on how to remove the marks, thank you all.  I trialled a couple of products on fabric scraps from the quilt and settled on Sard's Wonder Stick.  The samples were chalked really heavily and set with a hot iron.  Sard's completely removed the marks very quickly in cold water - so I went ahead and applied it to the chalk on the quilt and washed it in the machine.

There are still some orange markings I can see on the white fabric.  I was fairly sparing with the product, so another go should hopefully remove the rest of it.  It's a busy, blended quilt top, so unless you're looking pretty closely, the chalk won't be noticeable.
  
After Sard's Stain Remover

Lesson learned folks - mark and quilt quickly (I normally try to do it within a week) don't leave marked quilts sitting around in warm places, and that includes cats sleeping on them!


Thursday, February 17, 2011

Vol 2 - Project 7 - Card Trick - Blocks

Back again!  And here are the finished blocks.

The windowpane around each block really sets them off

I had no real problems putting the blocks together, just a bit of a wrangle with the pressing.  The coloured seam is rather tiny and the instructions ask you to press it towards the block, which is trickier than it sounds.

Pressing this little seam towards the block is awkward

My hefty iron didn't do a good job with this task - my seams ended up with dents and curves in them

This is what I found when I flipped the block over after pressing - messy seams!

For the next part of putting this block together, you need flat seams on the back - this won't do!

The solution was fairly simple and obvious - I used the iron to gently nudge the seam in the right direction, then flipped the block over to finish pressing.  A little burst of starch holds everything straight and flat.

To put the final round on, you need to sew from the back of the block.  Here's where you find out how important it is to have sewn precise 1/4" seams.  I'm glad I took the trouble to get this right, or there may have been tears!
That seam has to be very straight and exactly 1/4" wide ....................because 
.........you need that seam as a guide to sew the next one!
........which produces the tiny 1/4" windowpane framing the block

I admit to unpicking more than a few of the seams, but overall I was happy with the results. Measuring, sewing straight and trimming over and over again, can get a bit tedious but no-one said this quilt was of the quick 'n easy, sew-in-a-day type. 

Side setting triangles next - there is an option to add framing to these too and I think I'm going to give it a shot!


Wednesday, February 16, 2011

Vol 2 - Project 6 - Four Patch Lattice - Finishing

Apart from agonising over fabric choices more than usual, this top came together without any major dramas (or swearing) and I was even happy with the quilting.  Come to finishing it, usually the most stress free part of my quiltmaking, and the wheels well and truly fell off!

MARKINGS
I've done some daring things with markers, tried all kinds and without fail, they have washed out of my tops.  Not this time.  Harriet does warn against using yellow markers, as they can contain sulphur, but I used orange.  I tried a variety of colours to mark this top and orange was the only one I could see well.

I find it ironic that before quilting, I marked every block with orange chalk, and of course it rubbed off and was completly gone before I got to quilt it.  I resorted to re-marking each block just prior to quilting it.  After washing, using my usual method of cold water and a small amount of detergent, the orange remained firmly embedded in the quilting.  I'll re-wash but I rather think I'm stuck with it.

Orange quilting was not part of the plan!
TRIMMING
Again, I normally don't have a major problem with this, although I am still struggling a bit with the process.  Trying to make this quilt square was a lesson in frustration.
I measured and trimmed 3 times and got nowhere.  Here are the measurements in cms

                                             1ST TRIM        2ND TRIM        3RD TRIM
  • CENTRE LENGTH         1700                  1690                    1690
  • RIGHT SIDE                   1710                  1690                    1690
  • LEFT SIDE                      1700                  1700                   1695 
  • CENTRE WIDTH           1345                 1340                   1330
  • TOP                               1360                 1350                   1350
  • BOTTOM                       1355                 1340                   1340
The more I tried to square and trim, the worse things got till the figures simply made no sense at all.  I gave up before I'd trimmed away most of the quilt!  

My usual method - mark 1" below each red cornerstone

Join all the markings up with a single trimming line

Make sure the corner is square, and trim along the marked line
After giving this some thought, I think I know where I'm going wrong.  I literally can't see straight.  Most of the other quilts I've trimmed have a border or at least a seam line against which I can measure.  Without this reference point, I can't lay the ruler straight.  While to my eyes, it looks level, it isn't, the figures tell me that.  I did actually try to use the lines on the cutting mat to get the quilt edges straight, but as they were on the outside of the quilt, and as the quilt wasn't straight, it didn't work for me.
This is what I ended up with...............
This is the best I could do, and I admit to cheating (pulling and coaxing the edges together).

BINDING
Nope, not done yet.  I used a 'nifty' binding tool to end the machined binding.  So much more trouble than it's worth and the ends were too long to join properly anyway.  I eased them in but ended up with a bit of a pleat.  No big deal, I can live with that.

While hand sewing, I noticed 3 seams which weren't ditch-stitched.  Easy fixed, but annoying. 
The last thing is entirely my own fault and I'm glad it happened as I've learned yet again what not to do.  Don't use the thread cutter on the machine!  Harriet advises against this, but because I wasn't doing free-motion, I got lazy and used the cutter.  I have these little thread ends all over the back of my quilt...
Originally the thread cutter was making neat, short trims, but after being poorly adjusted by a sewing machine mechanic (long story), the thread now cuts too long. 

I started snipping while hand sewing the binding............ yup, nicked the backing didn't I.
There's a hole in your quilt dear Liza, dear Liza......... oh, and you can see here a seam which didn't get quilted.
To make the repair, I ironed over a bit of very light fusible interfacing (and finished the missing quilting).
  Guess where I'm putting the label?
All in all, I'm rather over this quilt.  I really liked the way it turned out and was looking forward to finishing it.  The little problems are fixable, but I don't know if I can live with the orange chalk.  Any suggestions?

Meanwhile I've been doing the windowpanes on the Card Trick quilt, with just the last round to go.  This process has had a few problems of it's own.  More about that next post.
Groovy man!
             

Monday, February 14, 2011

Vol 2 - Project 6 - Four Patch Lattice - Quilting

The fabrics on this top are so busy, the quilting needed to be very simple.  I decided on a geometric style, square-in-a-square-in-a-square.
Trialing a few sizes and angles

This is what I ended up with

The quilt was small enough to have a go at sewing this with the feed dogs up and pivoting to turn the corners.  To do this, rolling the quilt wasn't going to work, so stuffing it into the harp was the way to go.
Stuff, sew, pivot, is slow going

A large harp helps!

Free motion would have been much faster, but I'm happy with the results of using this slower method.  The stitch length is regular and the lines are straight for a change!

The side setting triangles also got a similar geometric design and were much faster to quilt.


The quilting from the back

I decided to try a slightly different order in finishing this quilt.  Before trimming and adding the binding, I washed and blocked it first.  I've heard about the method a couple of times and wanted to try it out. 

With this in mind, I made sure to lock off  the quilting stitches at the raw edges - these are normally secured by the binding before being washed.  Then I had to baste the excess backing fabric over the batting.  I machine basted rather than hand basted, which was not a good idea.


There was quite a lot of pulling on those side setting triangles when removing the basting from the wet quilt.  I found it tricky to block the quilt before trimming it as the edges were uneven, it was impossible to get accurate length and width measurements.


Here's the quilt drying on my floor.  I spent ages gently measuring and tugging to get those corners square.  A few minutes later the cats were having a wrestling match in the middle of it and the edges were all screwed up. 

Trimming and binding tomorrow.


Sunday, February 6, 2011

Vol 2 - Project 7 - Card Trick - Windowpane

The 18 blocks for this quilt are done and now it's time to add the windowpane.  Harriet has a neat trick in the book for getting the windowpane to a straight and precise 1/4 inch, without the headaches of wavy edges to deal with.  Even so, you need to be exact with seams, and measure and trim at each step.  No, it's not quick and easy, but the extra work pays off. 

This is my first ever attempt at a windowpane - it's not perfect but even so, I'm happy with the results.  Harriet's teaching methods and piecing techniques work so well, even a beginner can do this stuff.  Now that I understand how it's done, the rest should be better (and hopefully a bit faster)!


CURRENT Non Harriet Project
Yes, I know, I wasn't going to do these this year, but ................  this will be my weekly quilt group project for a while.

I really want to level up my applique work a bit.  The previous projects were fun, using heavy thread for a cartoonish look but not very refined.  This time I've chosen a pattern from Michelle Hill's book, 'William Morris in Applique'.  Lots of curves and tiny points to deal with.  The pattern is called Birds - it's a wall hanging so not too large.

The centre panel of 'Bird'

As usual, the fabric selection was agonising - I wanted to use blues like the one pictured in the book, but lacked the right fabrics, so ended up with red/gold/green which I'm still not too sure about.  I've planned to use rayon thread, as recommended by Michelle and a tiny blanket stitch.  It wasn't until after I'd cut the applique shapes that I realised that Michelle sewed this one by hand!  Uh oh - maybe those teeny tiny points are going to be a problem!